Controllable Generation with Fixed GANs
Conditional GAN architectures such as cGAN learn to generate fake images with a specific condition. For example the generator can be forced to generate images of people smiling, with or without glasses or with a specific hair color. But in order to achieve this, the GAN must be trained alongside with the conditional information. What if you are given a fixed trained GAN that was not trained with additional condition information, is it still possible to force the generator to generate images with specific features? according to this paper: Interpreting the Latent Space of GANs for Semantic Face Editing, YES you can!
The paper explores how different features are encoded in the latent space and show how by moving around this space you can control the features of a generated fake image.
In this post I will show how to turn a fixed unconstrained GAN to a controllable GAN just by moving around the latent space in the right direction.
All the code can be found on my github and the fixed trained wGAN trained on celeba is implemented here.
Latent Space Interpolation
The generator of a trained GAN is a function \(g:Z \to X\) where \(Z \subseteq \mathbb{R}^d\) is the \(d\)-dimensional latent space from which a noise vector is drawn and \(X\) is the image space. What’s cool about this mapping is that small changes in a random vector \(z \in Z\) correspond to small changes in the generated image. To visualize this coolness I can draw two vectors \(z1,z2 \in Z\) and sample vectors on the linear interpolant between them:
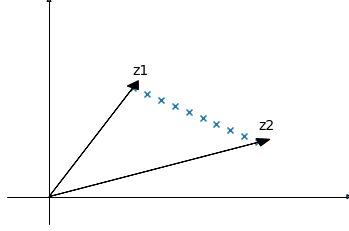
Then pass each vector through the generator and display the output:
z1 = torch.randn(1, 100, 1, 1, device=device)
z2 = torch.randn(1, 100, 1, 1, device=device)

fakes = []
for i in torch.linspace(0,1,10):
    with torch.no_grad():
        fake = generator(z1*i+z2*(1-i))
    fakes.append(fake)

mymshow(utils.make_grid(torch.cat(fakes,0),nrow=10,normalize=True),fig_size=[100,100])

\(z1\) and \(z2\) are the left and rightmost images and you can see a smooth transition between them.
Controllable Generation
Just like with image interpolation, controllable generation also takes advantage of the fact that small changes in the latent space correspond to small changes in the generator output, except that instead of moving on an interpolation between two vectors we move in a direction that only changes a single feature of the image. For example, if the output of the generator for a vector \(z1\) is a man without glasses, and we want to generate a man with glasses, we can move in a direction \(n\) that (nearly) doesn’t change anything in the image except adding the man glasses: \(z1_{new}=z1+\alpha n\) (\(\alpha\)=step size).
Latent Space Separation
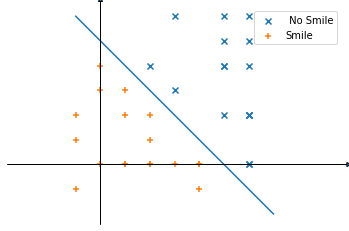
The paper makes the assumption that for any binary feature (e.g., glasses\no-glasses, smiling\not-smiling, male\female) there exists a hyperplane in the latent space serving as the separation boundary. For example if \(Z \subseteq \mathbb{R}^2\) then there exists a line that separates points that generate images with or without a smile.
Starting with a vector \(z\) and moving in the latent space, the feature we are trying to change will remain the same as long as we are on the same side of the hyperplane. When the boundary is crossed, the feature turns into the opposite. To flip a feature in the fake image, the random \(z\) must be edited to be closer and closer to the boundary until it crosses it:
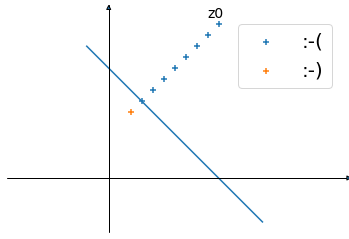
Starting with \(z_{0}\) that generates an image without a smile :-( and editing it with \(z=z+\alpha \vec n\) where \(\vec n\) is the normal vector of the hyperplane until the boundary is crossed and the generated image is smiling :-).
To learn these boundries, tuples of <latent vector, feature score> were generated and used to train independent linear SVMs for each feature. They published the code here.
Classifier Gradients
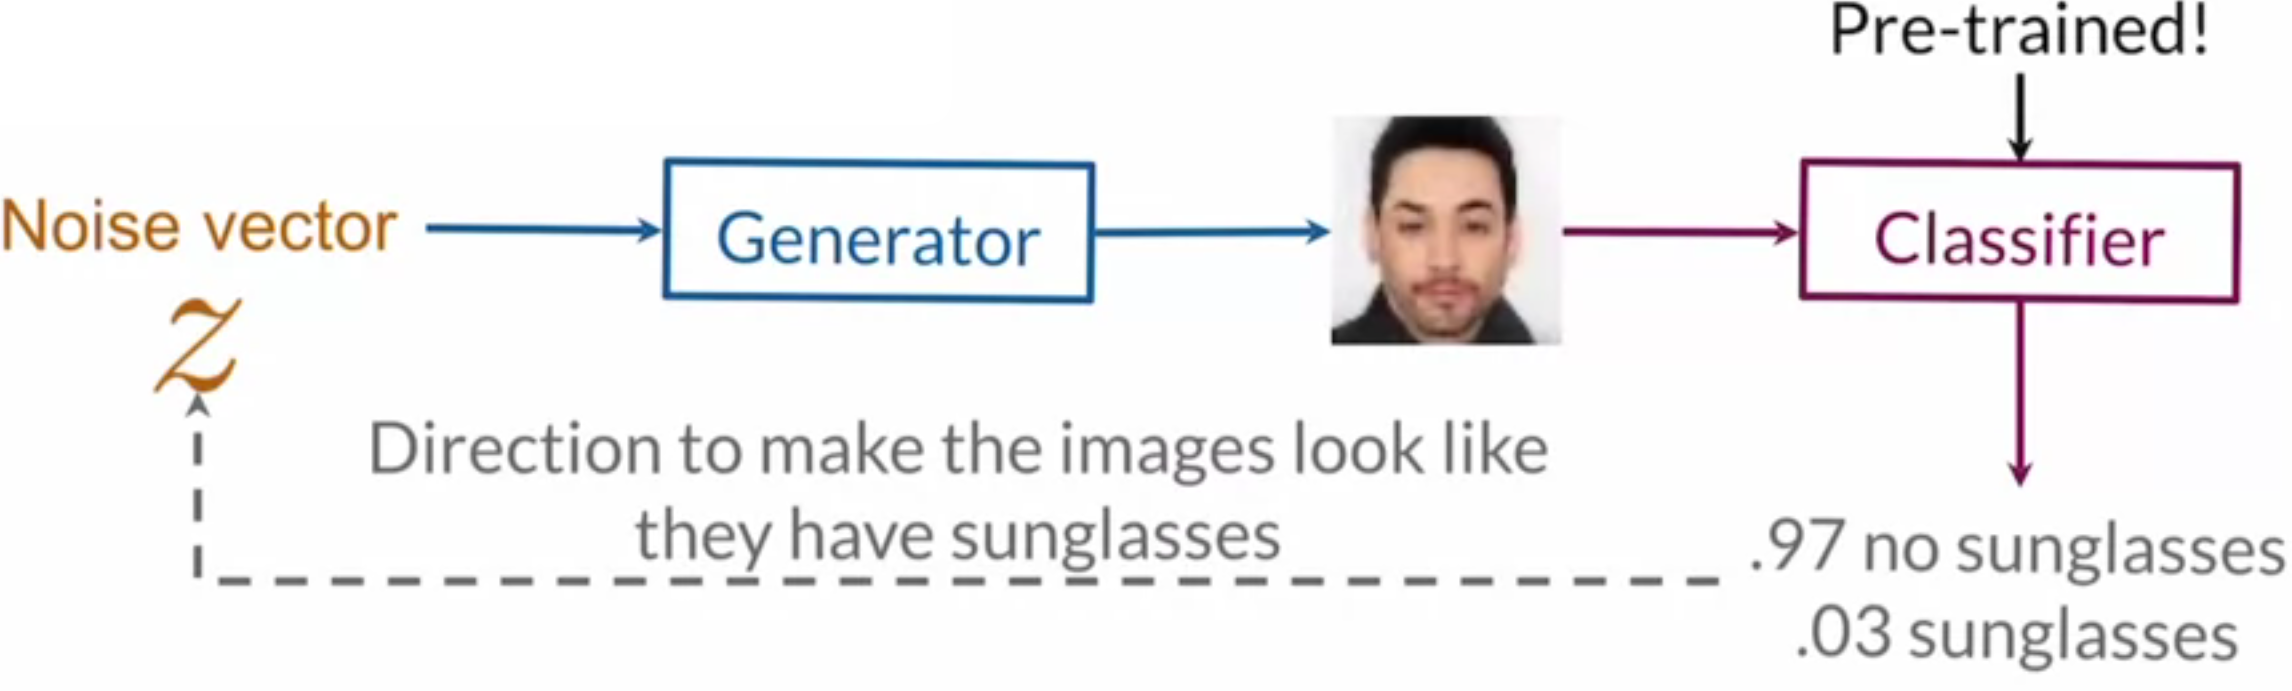
Instead of learning separation boundaries and editing \(z\) towards them, A different technique can be used. A pre-trained feature classifier can be applied on a fake image to calculate the probability of having a specific feature. Then \(z\) can be edited according to the gradients of the probability with respect to \(z\) towards improving the probability. This iterative process does not train the GAN or the classifier, its “training” the noise vector \(z\) to output fake images with higher score of a specific feature.
 deeplearning.ai
Classifier
To train the feature classifier, I use the celeba dataset with facial attributes:
mean,std=[0.5, 0.5, 0.5], [0.5, 0.5, 0.5] # Same as when training the GAN.
compose = transforms.Compose([
    transforms.RandomHorizontalFlip(),
    transforms.Resize(64),
    transforms.CenterCrop(64),
    transforms.ToTensor(),
    transforms.Normalize(mean=mean, std=std)
])

train_dataset = torchvision.datasets.CelebA('celeba',split='train',target_type='attr', transform=compose, download=True)
valid_dataset = torchvision.datasets.CelebA('celeba',split='valid',target_type='attr', transform=compose, download=True)
Each image in the dataset has a hot encoded tensor of 40 features but I am only going to train to classify 4 of them:
relevant_attributes = ['Black_Hair', 'Blond_Hair', 'Eyeglasses','Smiling']
Resnet18 model with a 4 output linear layer followed by sigmoid to calculate the probability of each feature.
class NNet(nn.Module):
    def __init__(self, num_attributes):
        super(NNet, self).__init__()
        # NOT pretrained because normalization parameters are different.
        self.classifier = torchvision.models.resnet18(pretrained=False)
        self.classifier.fc = nn.Linear(self.classifier.fc.in_features, num_attributes)
    def forward(self, xb):
        yhat = self.classifier(xb).sigmoid() # NOT softmax because multilabel!
        return yhat
Standard training loop code is here.
Test an example image from the dev_set and classify feature as True if prob > 0.5:
classifier.eval()
print(f'label = {valid_dataset[idx][1][relevant_indices]}')
with torch.no_grad():
    print(f'prediction = {classifier(valid_dataset[idx][0].unsqueeze(0).to(device)) > 0.5}')
mymshow(valid_dataset[idx][0],std,mean)
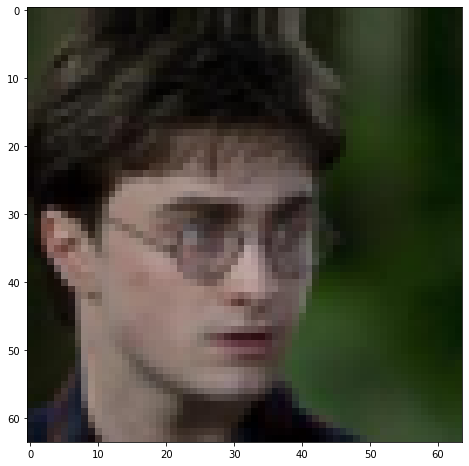
# ['Black_Hair', 'Blond_Hair', 'Eyeglasses','Smiling']
label = tensor([0, 0, 1, 0])
prediction = tensor([[False, False,  True, False]], device='cuda:0')
Classifier performance is good enough for this exercise.
Editing Latent Space
I now have all the building blocks I need: A fixed wgan trained without feature information and a classifer that can score features. I can now edit a random \(z\) vector and change specific features in the fake image. Let’s try adding a smile to a fake image.
Sample a random vector \(z\) and allow gradient computation on it. We need gradients to do a gradient ascent towards improving the feature probablity the classifier gives the image.
z = torch.randn(1, 100, 1, 1, device=device).requires_grad_()
The fake image generated from \(z\) and the probability of it containing a smile:
with torch.no_grad():
    fake = generator(z0)
smile_p = classifier(fake).squeeze(0)[SMILE_INDEX]
mymshow(fake.squeeze(0), std,mean,xlabel=f'p(smile)={smile_p.sigmoid():.2f}')
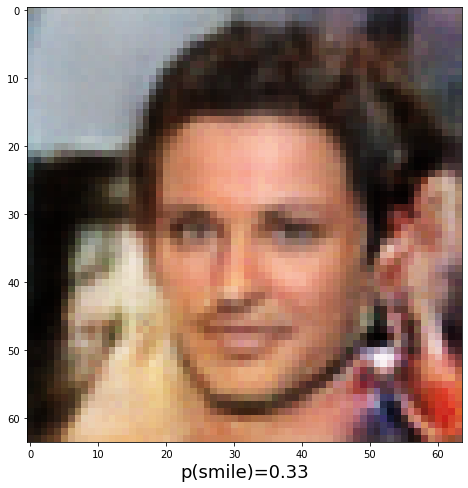
To get this image to smile we are about to edit \(z\) in small steps, each step will make the image a bit happier :-)
The iterative process is:
- Generate fake image from \(z\).
- Score fake image feature using classifier.
- Compute gradients of the score with respect to \(z\).
- Perform gradient ascent on \(z\) in the direction of improving the score.
This is done while the probability of a smile is under 0.995:
lr=0.1
while smile_p.sigmoid() < 0.995:
    classifier.zero_grad()
    fake = generator(z) # 1
    smile_p = classifier(fake).squeeze(0)[SMILE_INDEX] # 2
    smile_p.backward() # 3
    z.data = z + (z.grad*lr) # 4
Note that I removed the sigmoid from the classifier model and added it manually only to print and compare more easily. The gradients are calculated without the sigmoid to avoid vanishing gradient problems I had during this iterative process - when the probability of a feature was close to zero (no smile at all) the sigmoid gradient was 0 and the \(z\) vector didnt move at all.
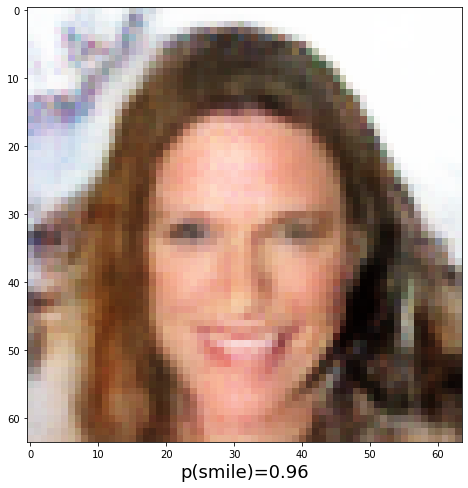
When displaying the fake image from each iteration you can see how it gradually changes towards having a smile on the face:

This process can be done in the opposite direction to remove a smile:
generate a fake image:
with torch.no_grad():
    fake = generator(z0)
smile_p = classifier(fake).squeeze(0)[SMILE_INDEX]
mymshow(fake.squeeze(0), std,mean,xlabel=f'p(smile)={smile_p.sigmoid():.2f}')
Now the iterative process will end when \(p(smile) < 0.1\) and step 4 will update \(z\) away from a high smile score:
while smile_p.sigmoid() > 0.1:
    classifier.zero_grad()
    fake = generator(z) # 1
    smile_p = classifier(fake).squeeze(0)[SMILE_INDEX] # 2
    smile_p.backward() # 3
    z.data = z - (z.grad*lr) # 4

The same process can be used to changed other features the classifier was trained to score, here is an example of turning the hair of a fake image black:

Conclusion
In this post I showed how to take a fixed WGAN trained on celeba and use a feature classifier to walk around the latent space in the direction of adding or removing a feature.