Deepfood - Image Retrieval System in Production
In this post I will build and deploy a food image retrieval system. I will use pytorch to train a model that extracts image features, Annoy for finding nearest neighbor images for a given query image, starlette for building a web application and AWS Elastic Beanstalk for deploying the app. Lets begin!
The full code is here: github.
Introduction
The goal of an image retrieval system is to let a user send a query image and return a list of most similar images to the query. For example with google reverse image search you can send an image and get all similar images and their web pages. Amazon also has an option to search by image, just take a picture of something you see and immediately get a list of items sold by amazon that look the same as your picture.
I’m going to build an application to retrieve food images and deploy it as a web service.
System Architecture

Workflow
- Train Models
- Train embedding extractor based on resnet34
- Build Annoy nearest neighbor index
- Save to s3
- Serve web app
- Create docker image
- Download annoy index + resnet model from s3 to docker image
- Serve on Elastic Beanstalk
- Accept client requests
- Client sends an image
- Web app transforms image to an embedding using pytorch model
- Web app finds approximate nearest neighbors of embedding using Annoy
- Return to client list of nearest images id’s
- Client downloads images from s3
Screenshot
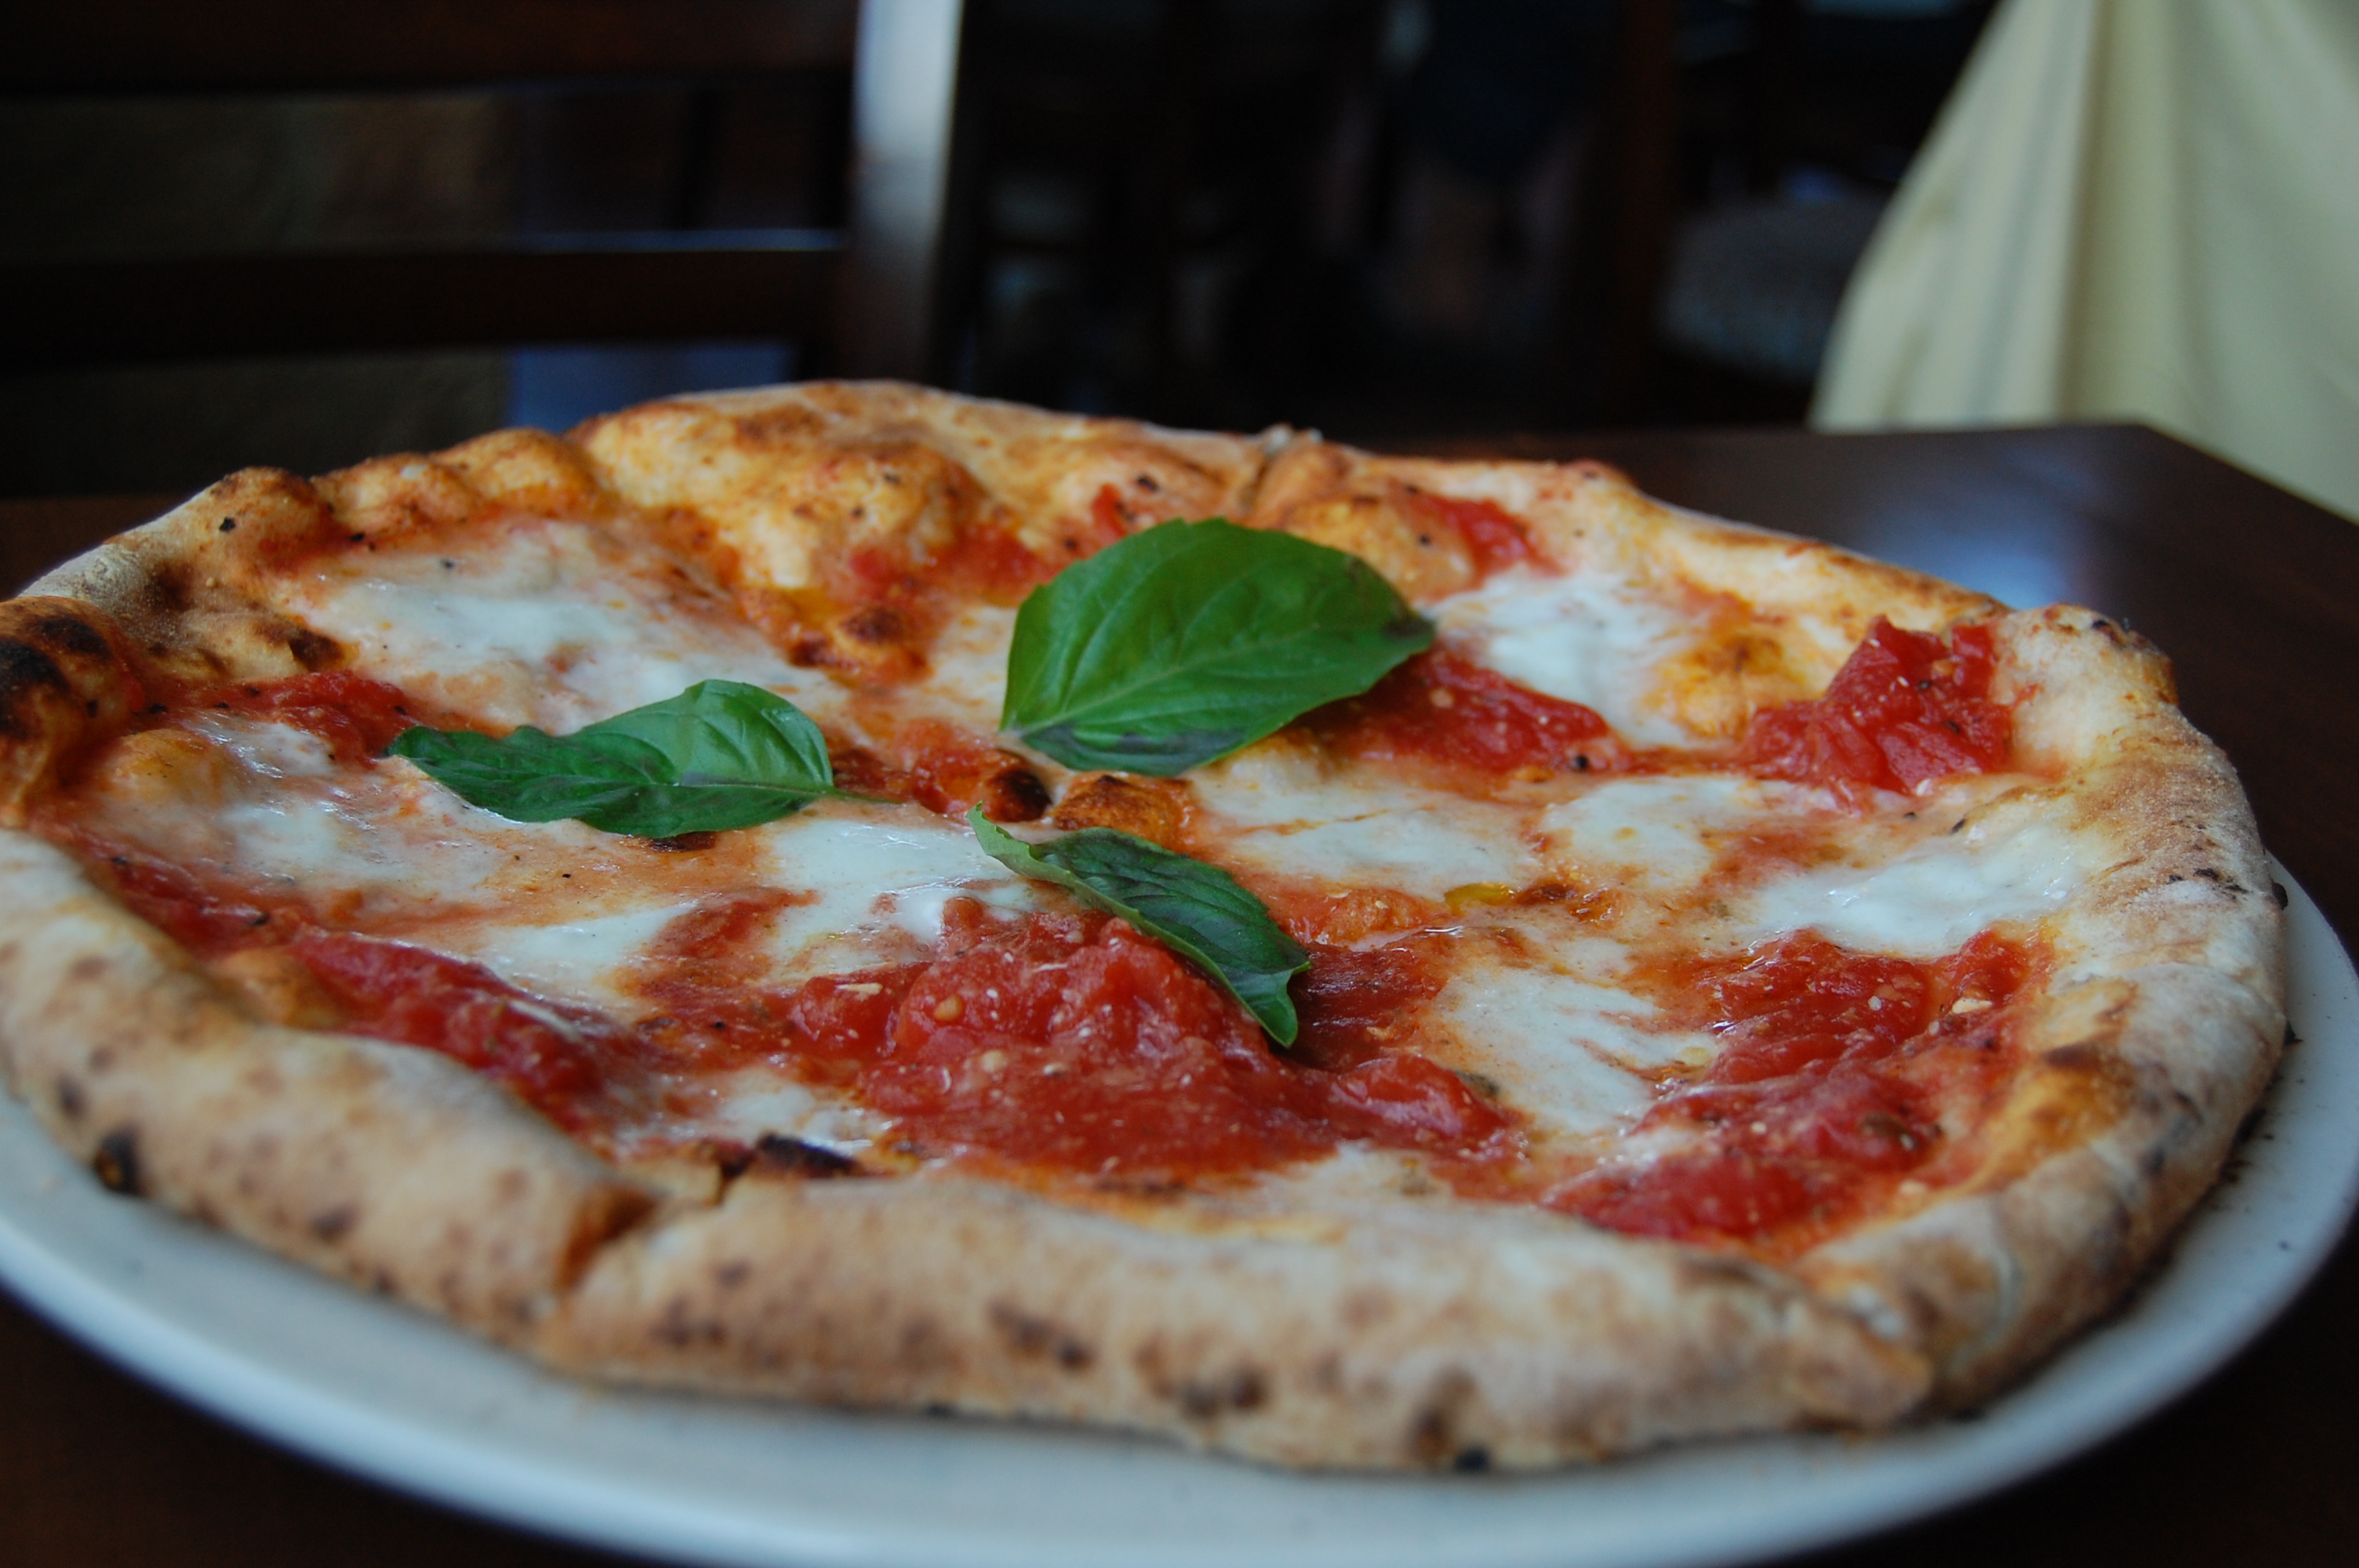
The web app has a simple UI, uploading this image
will have the following output
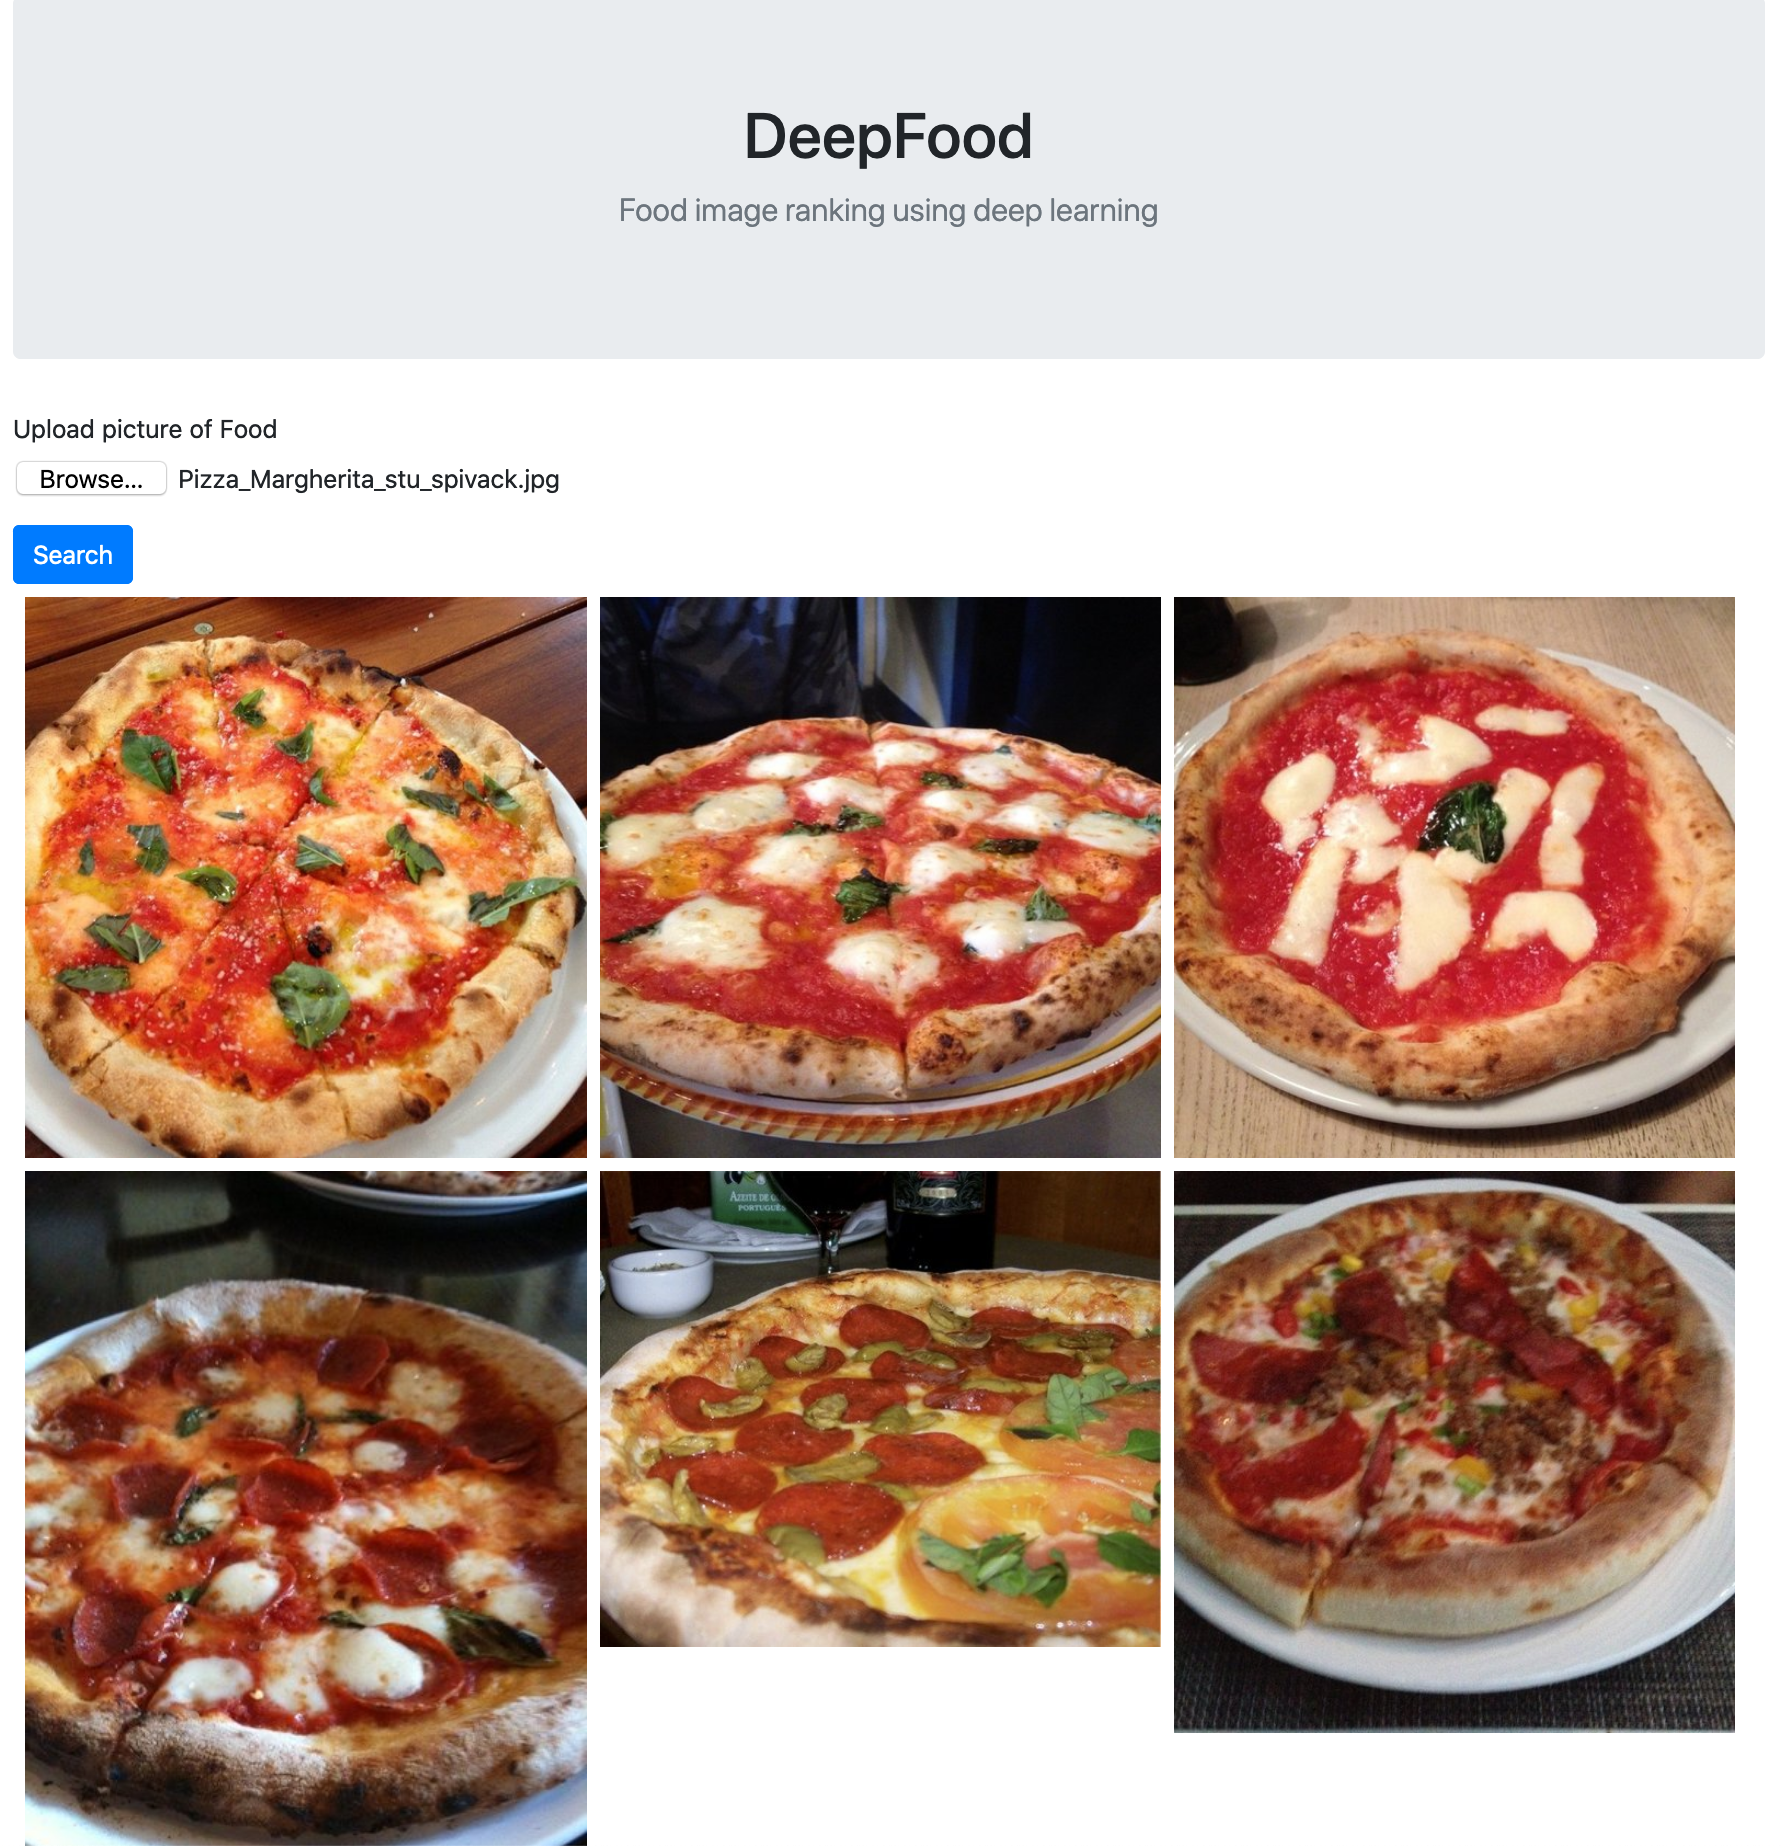
Image Similarity
The idea behind an image retrieval system is having each image represented as an N dimensional vector (embedding). Just like in word2vec, similar images will be close to one another in this N dimensional space.
We need some kind of black box that takes an image and transforms it to an embedding, use this black box to transform our database of images to embeddings, then for every query image just find the closest embeddings from our database and return the images.
Turns out deep neural networks are great black boxes for extracting embeddings! Each layer in a trained neural net learns to extract different features of an image, lower layers learn features such as “image contains a circle” and deeper layers learn features such as “image contains a dog” [1]. To use a trained neural net as a black box I use pytorch hooks to extract the output of one of the last layers.
The distance between two images is then computed by:
 I use a pre-trained resnet34 model and fine tune it to my specific domain - food images
 ![]() .
The reason I fine tune and not just use the pre-trained weights is because it was trained on imagenet with 1000 classes. The features extracted from deep layers could be “is there an eye”, “is there a big grey thing”, “are there ears” (probably
.
The reason I fine tune and not just use the pre-trained weights is because it was trained on imagenet with 1000 classes. The features extracted from deep layers could be “is there an eye”, “is there a big grey thing”, “are there ears” (probably ![]() ), but I need features more specific to food for example “is there a red round thing”. Of course we don’t know what features the model learns but later I will try to guess.
), but I need features more specific to food for example “is there a red round thing”. Of course we don’t know what features the model learns but later I will try to guess.
Part I - Train Model
The full training code containing the dataset creation, training loops etc is in this notebook.
The dataset I use for fine tuning the model is iFood, which contain food images like
 First step is to download the resenet34 pre-trained model and replace the last layer with a new one with 251 outputs which is the number of classes in the ifood dataset.
model = models.resnet34(pretrained=True)
num_ftrs = model.fc.in_features # output of previous layer
model.fc = nn.Linear(num_ftrs, 251)
After about 20 epochs the top3 accuracy is around 0.84, this brings me to the middle of the scoreboard and is good enough for extracting embeddings. State of the art image similarity systems use a triplet loss function and don’t train on a classification problem. 2, 3.
Extract Image Embeddings
To extract the embeddings of an image I use pytorch hooks mechanism to save the layer before the last fully connected layer.

EmbeddingExtractor class registers a hook to the model on _init_. When get_embeddings() is called the image is passed through the network and the embedding will be waiting in self.embeddings field.
class  EmbeddingExtractor:
    def sniff_output(self,model, input, output):
        self.embeddings=output
    def __init__(self):
        self.model = models.resnet34(pretrained=False)
        self.model.fc = nn.Linear(self.model.fc.in_features, 251)
        self.model = self.model.to(device)
        self.model.load_state_dict(torch.load('model.pt'))
        self.model.eval()
        layer = self.model._modules.get('avgpool')
        self.handle = layer.register_forward_hook(self.sniff_output)
    def get_embeddings(self, input):
        with torch.no_grad():
            self.model(input.to(device))
        return self.embeddings.squeeze(-1).squeeze(-1)

extractor = EmbeddingExtractor()
And thats our black box ![]() .
.
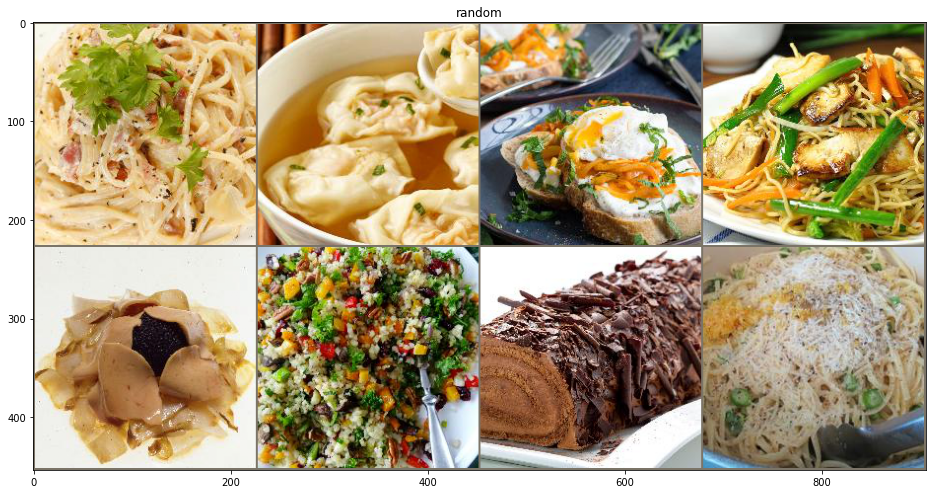
What are Embeddings
The neural network extracts for each image a 512 dimension vector where each index represents a feature of the image. These features were learned automatically but we can still try to guess what each feature represents by feeding lots of images through the network and displaying the images that maximize a specific feature.
First I calculate the embeddings for all images in the dataset (full code is here)
all_emb=torch.tensor([])
for i,batch in enumerate(tqdm(dataloader)):
    emb = extractor.get_embeddings(batch['image'].to(device)).detach().cpu()
    all_emb=torch.cat([all_emb,emb],dim=0)
Then I choose feature index 10 (out of 512) and display the top 10 images with highest value
def display_best_images(feature_index):
    top_ten = sorted(range(len(all_emb)), key=lambda k: all_emb[k][feature_index].item(),reverse=True)[:10]
    top_images = torch.stack([train_dataset[i]['image'] for i in top_ten])
    imshow(vutils.make_grid(top_images, nrow=5, padding=2),f'index={feature_index}')
display_best_images(10)
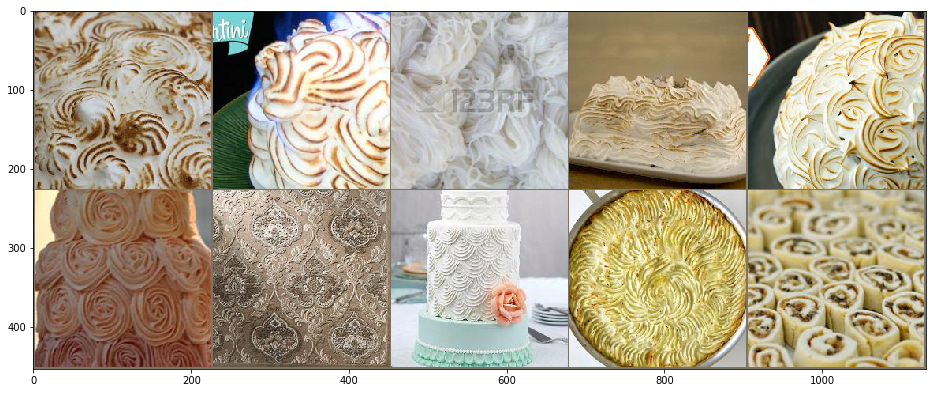 Looks like feature 10 is “image contains lots of curly thin lines”. These images don’t have to look alike, they just share this single trait. Images that (in human eyes) are similar will share many of these traits and be close to one another in the embedding space.
Nearest Neighbors Search with Annoy
Annoy (Approximate Nearest Neighbors Oh Yeah) is a library to search for points in space that are close to a given query point. I build an Annoy index of all my images embeddings and then query the index with a user image embedding to get the approximate nearest images.
Part II - Deploy Application
Creating the model and index for image search is nice and interesting, but in order to use it in a real world application I will deploy a service that accepts user images and returns a list of results. The images, model and index will all be stored in an s3 bucket.
Create Index & Upload to S3
The index of images will be created from two datasets: iFood which is the data I trained on, and Food 101. The id of each image is the filename in this format <id>.jpg. I use this script to download the datasets, put all the images in the same folder and change all the filenames to id’s. To create the Annoy index I iterate through all the images, extract their embedding and add the embedding to Annoy
t = AnnoyIndex(512, 'euclidean')
for batch in tqdm(dataloader):
    embeddings = extractor.get_embeddings(batch[0])
    for i in range(len(batch[2])):
        emb = embeddings[i]
        img_id = os.path.basename(batch[2][i]).split('.')[0]
        t.add_item(int(img_id),emb)
t.build(5) # 5 trees
t.save('tree_5.ann')
I’m building the Annoy index with 5 trees, this is a configuration that tradeoffs size of index, speed and accuracy. The full notebook here.
Next step is to upload the index, the resnet34 embeddings extractor and all images to s3 using the aws cli
aws s3 cp --acl public-read model.pt s3://deepfood/
aws s3 cp --acl public-read tree_5.ann s3://deepfood/
aws s3 cp --acl public-read index_images  s3://deepfood/ --recursive
Web App
The application that binds everything together, gets user queries, searches nearest neighbors and returns the result. I use starlette which is a microframwork based on python asyncio (In this case there is no reason not to use flask which is more popular). The full code can be found here and I will go over the important parts.
routes.py contains the endpoints of the application, the important route is ‘/search’ which accepts a POST request containing the image
@app.route('/search',methods=['POST'])
async def search(request):
    data = await request.form()
    content = data['image'].split(';')[1]
    image_encoded = content.split(',')[1]
    image_bytes = base64.decodebytes(image_encoded.encode('utf-8'))
    image = Image.open(io.BytesIO(image_bytes))
    embedding = extractor.get_embeddings(image)
    result_ids = ann_index.get_nns_by_vector(embedding, 9)
    urls = [f'https://deepfood.s3-us-west-2.amazonaws.com/ifood/{i}.jpg' for i in result_ids]
    result = {'urls':urls}
    return JSONResponse(result)
The code extracts the image from the request, computes embeddings using our trained resnet, calls Annoy search function and returns a list of URL’s for the frontend to display.
extractor.py contains the code that initializes the models.
index.html is the front-end html, nothing special here except a little trick to get faster results. Instead of sending the full image (1-3MB) I added a script that resizes the image to our model input size 224*224 before sending to server.
Docker
Easiest and most standard way of deploying an application is packaging it in a docker image. The set of instructions to build the image are written in the Dockerfile:
FROM tiangolo/uvicorn-gunicorn:python3.7
WORKDIR /app
COPY requirements.txt /app
EXPOSE 80
COPY ./app /app
RUN mkdir app/models/
RUN wget --output-document=app/models/model.pt  https://deepfood.s3-us-west-2.amazonaws.com/model.pt
RUN wget --output-document=app/models/index.ann https://deepfood.s3-us-west-2.amazonaws.com/tree_5.ann
RUN pip install -r requirements.txt
The first line inherits the docker file from tiangolo/uvicorn-gunicorn which takes care of running the server. The rest copy the code into the image, installs requirements and downloads the models from s3.
to build and run the image
docker build -t myimage ./
docker run -d --name mycontainer -p 80:80 myimage
application can be accessed at localhost:80
Deploy - AWS Elastic Beanstalk
Elastic Beanstalk is an AWS service for deploying web applications. It supports docker and expects the Dockerfile to instruct it on how to build and deploy the image. Deploying on Beanstalk is easy peasy once you have a Dockerfile and the eb-cli tool.
step 1 - create a new eb application
eb init -p docker deepfood
step 2 - create configuration file .ebextensions/custom.config so that the instance we get has enough memory and storage space to use our models
aws:autoscaling:launchconfiguration:
  InstanceType: t2.large
  RootVolumeType: standard
  RootVolumeSize: "16"
step 3 - Create a new environment with the application
eb create deepfood-env
Thats it! the application is up and running! Go to elasticbeanstalk dashboard to get the link, or just run
eb open
More info can be found in official doc
Summary
In this post I deployed an image retrieval system on aws. These were the steps:
- Fine tune resnet34 model on food images.
- Build Annoy index.
- Upload model, index and all images to s3.
- Deploy web application with eb-cli.
![]()